Wasm and Emscripten
2024-02-21
#workshop #wasm
Siddharth Tewari, Abhinav Chennubhotla & Sriprad Potukuchi
A brief history of cloud computing and virtualisation
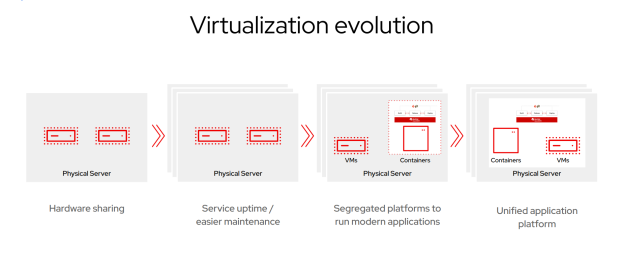
The cloud has often been simply described as “someone else’s computer”. Back in the old days of yore, people would have to setup and manage their own hardware infrastructure and servers.
This was quite a hassle and also quite expensive. Cloud computing evolved as a solution to this issue. People no longer had to buy, maintain, manage or setup their own hardware. It worked out to be cheaper too, since people could pay only for the resources they used.

This gave rise to various virtualisation technologies like docker and in the 2010s the adoption of cloud native tech was on the rise.
What is WebAssembly?
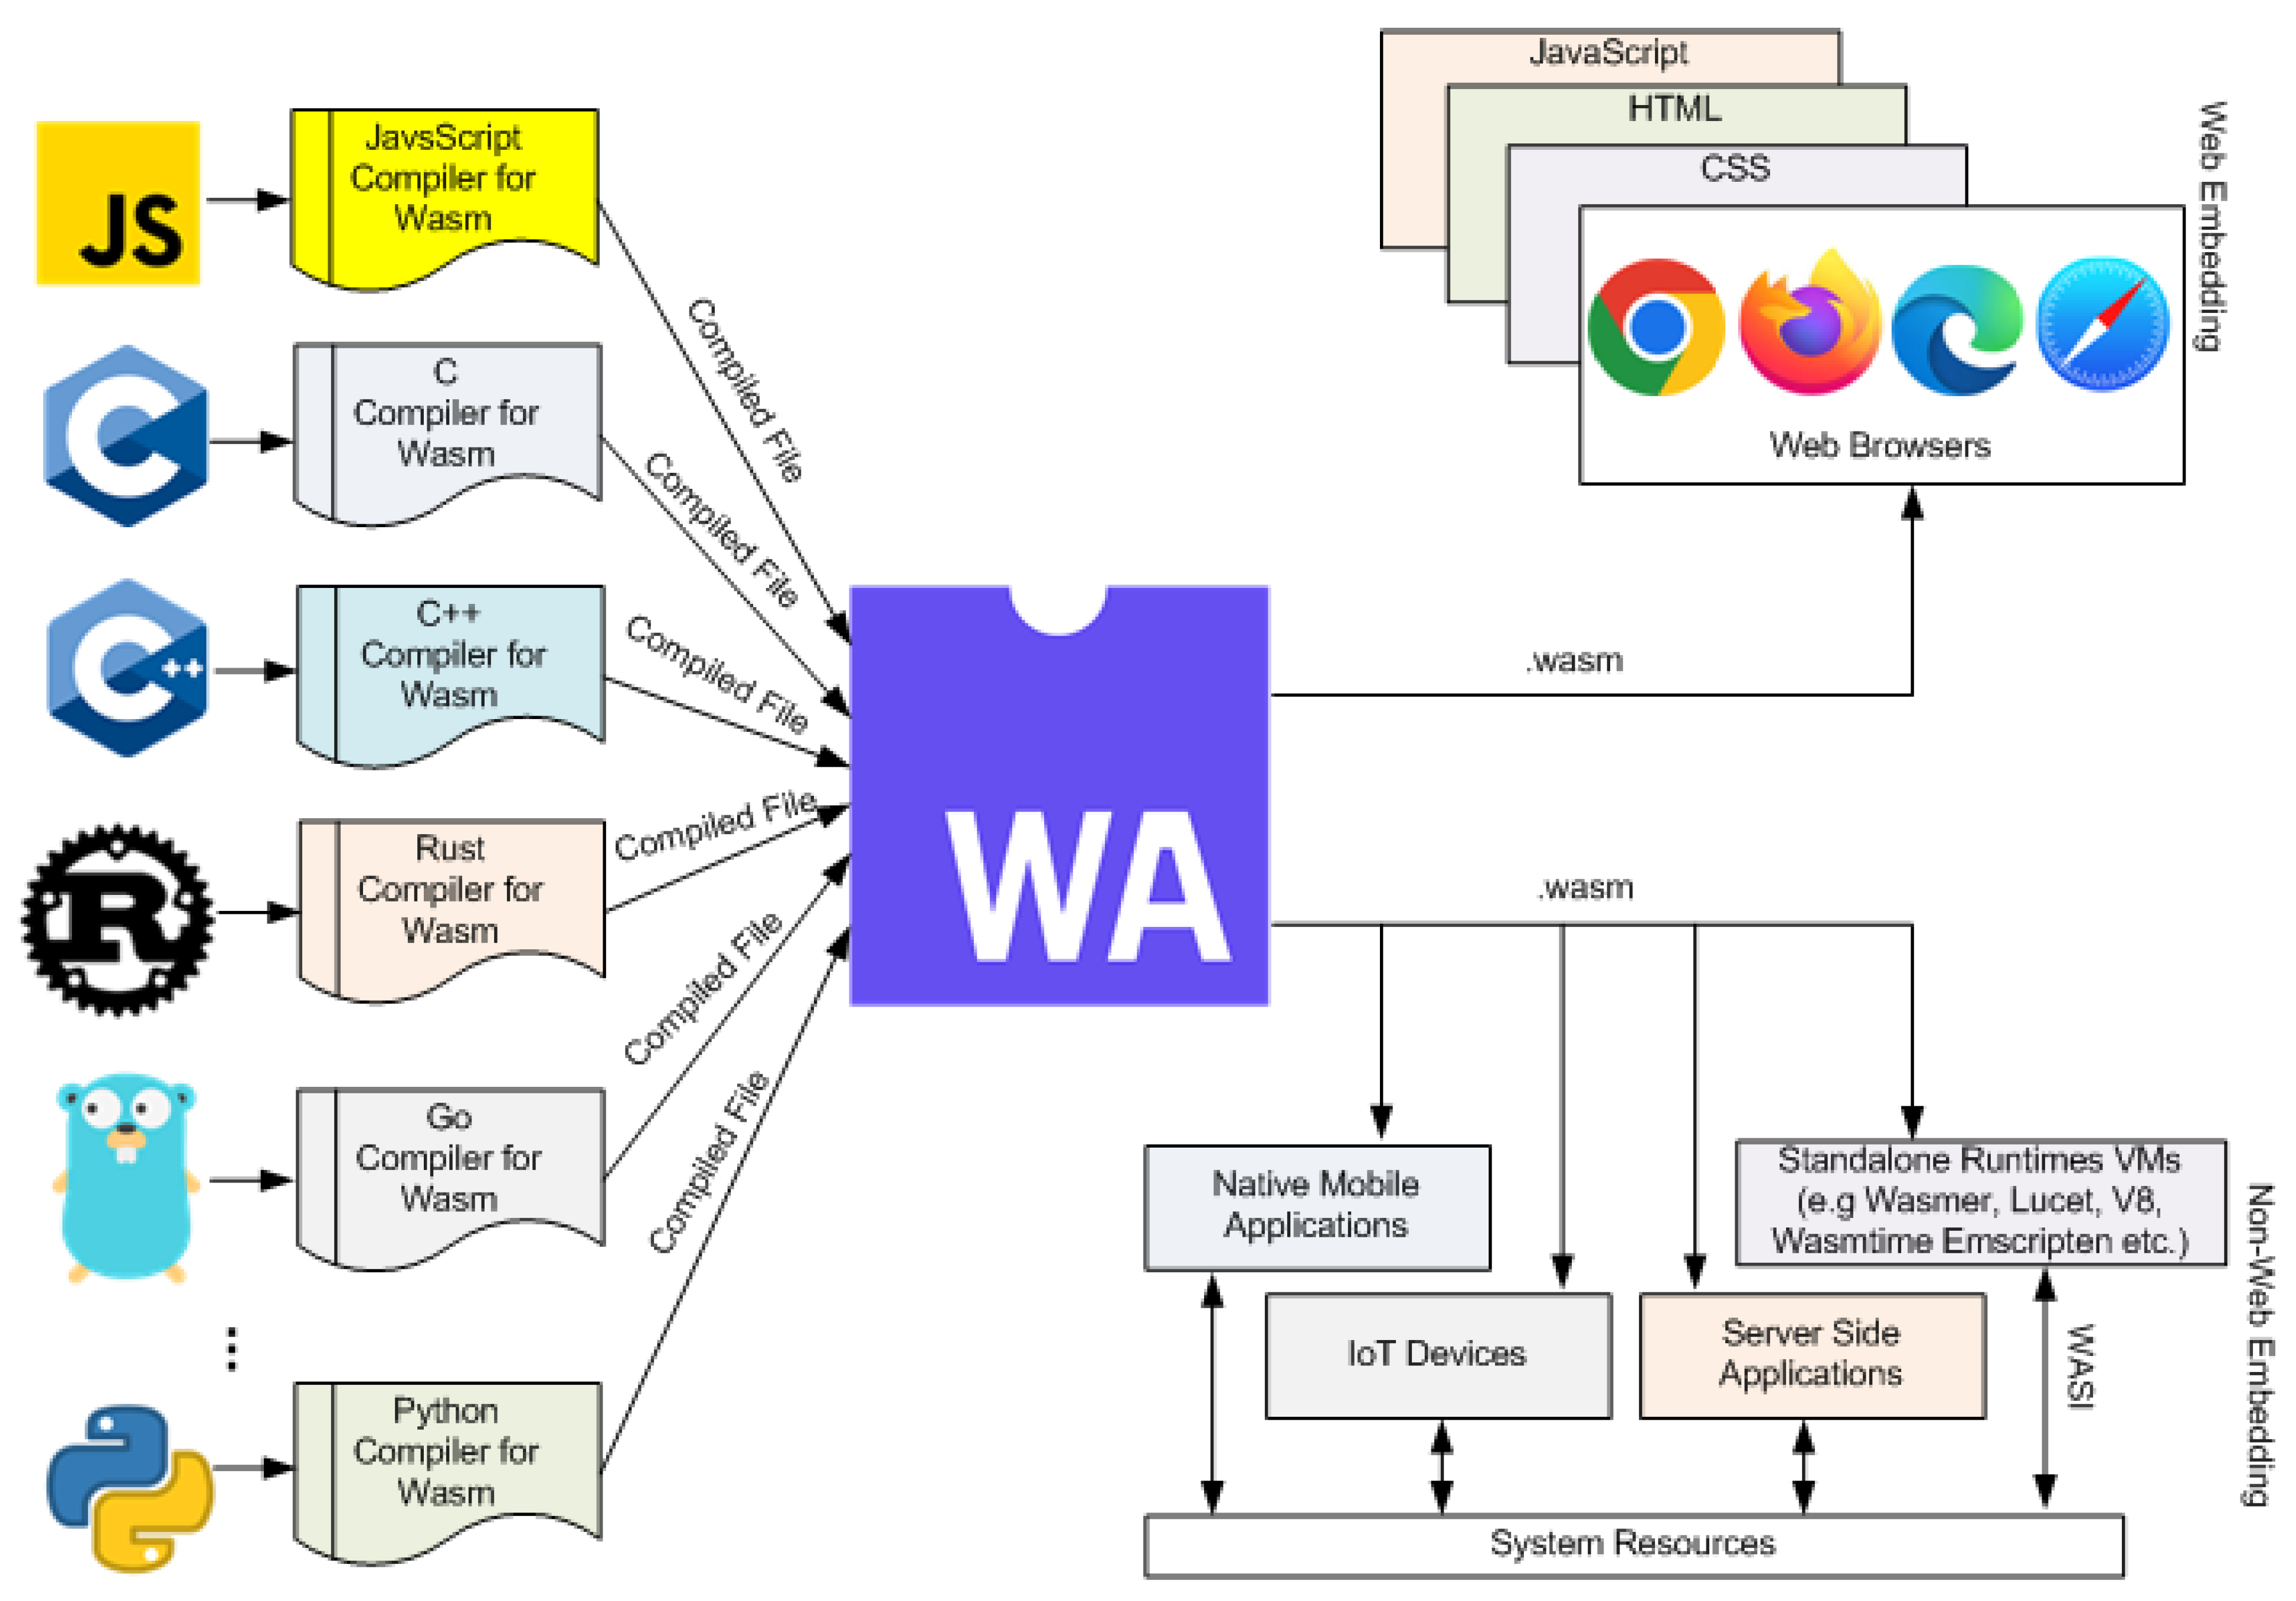
- WASM or WebAssembly is is a binary instruction format for a stack-based virtual machine.
- Wasm is designed as a portable compilation target for programming languages, enabling deployment on the web for client and server applications.
- WASM has multiple embedding interfaces including: JavaScript APIs, Web APIS, and the WASI API.

Why WASM?
- The binary format for WebAssembly can be natively decoded much faster than JavaScript can be parsed (experiments show more than 20× faster). On mobile, large compiled codes can easily take 20–40 seconds just to parse, so native decoding provides a better user experience.
- But asm.js already exists?(asm.js is a subset of js designed to allow languages such as C to be run as web apps)
- By avoiding the simultaneous asm.js constraints of AOT-compilability and good performance even on engines without specific asm.js optimizations, a new standard makes it much easier to add the features required to reach native levels of performance.
- asm.js is essentially just regular js but with AOT compilation and a few other bells and whistles.
- WASM app sizes are also much smaller compared to regular app images.

Where is WASM?
- Made with WebAssembly
- WebAssembly cut Figma's load time by 3x
- WebAssembly brings Google Earth to more browsers
- Fture work on non web embeddings with the advent of things like WASI
- Fermyon
- Fermyon Spin Serverless AI Inferencing with the spin framework
Lets get coding!
So what will we be using? Well, we'll be using:
- Emscripten: a compiler toolchain for WASM, used to compile C/C++ code(or any other lanugage that uses LLVM) to WASM.
- Raylib: a cross-platform open-source software development library to create graphical applications and games.
Installation
For Windows:
git clone https://github.com/emscripten-core/emsdk, or download the zip folder.- cd into it and run .\emsdk install latest, and then .\emsdk activate latest
- every time you open a new cmd, you have to cd into the repo and run .\emsdk activate latest
- Verify that emcc is installed by running the emcc command.
Make a new project folder for the workshop.
Then, get raylib:
- Raylib-5-Release: scroll all the way down and get the raylib-5.0_webassembly.zip or just download the one we sent(its the same thing)
- Extract the zip file into your project folder. Rename the extracted folder to raylib.
For Linux:
git clone https://github.com/emscripten-core/emsdk- cd into it and run
./emsdk install latest, and then./emsdk activate latest - Every time you open a new terminal window, you will have to cd into the repo and run
./emsdk activate latest - Execute
source ./emsdk_env.sh - Verify that emcc is installed by running the emcc command.
Make a new project folder for the workshop.
Then, get raylib:
- Raylib-5-Release: scroll all the way down and get the raylib-5.0_webassembly.zip or just download the one we sent(its the same thing)
- Extract the zip file into your project folder. Rename the extracted folder to raylib.
- Create a
main.cfile. - Your project folder should look like this now:
├── main.c
└── raylib
    ├── include
    │   ├── raylib.h
    │   ├── raymath.h
    │   └── rlgl.h
    ├── lib
    │   └── libraylib.a
    ├── LICENSE
    └── README.md
After populating your main.c file, run this command to build:
emcc main.c -Lraylib/lib -lraylib -o index.html -s USE_GLFW=3
You will notice a few files created by emcc. You now have to open the index.html file in your browser.
A neat way of doing this is to host a simple web server using python, and making a request to it from your browser.
Run python3 -m http.server 8080, and navigate to your browser and type localhost:8080
You should now see your program being run in the browser!